Monday 31 December 2012

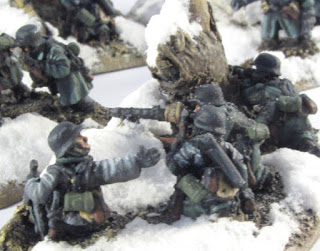
Snow Effects - Battlefront Germans

Really happy with how these came out, spent a little bit more time and I think it paid off. 2013 will see a lot more 15mm from me, Normandy and Arab-Israeli for Yom Kippur, both projects for me!

These little chaps are BF with a few Peter Pig thrown in, snow is Bi-carbonate of soda and PVA - simples!

As always full pictures on my flickr :
 http://www.flickr.com/photos/troop-of-shewe/sets/


Sunday 30 December 2012

Normandy Vignettes


Three 20mm Vignettes. These use Milicast vehicles, AB figures and The Kings Armourer bases.  I'm happy with the results, but this one took an age to finish, the vehicles were particularly fiddly and would swap out with Dragon kits where available. As always there are a few areas I can improve on, but thats for the next set. Everything is pinned to the bases so they just about survived their trip to Australia.
 
Currently working on that Large 28mm Noramndy Commission in time for Salute, its looking impressive so far!
 
As always full pictures on my flickr :


Friday 30 November 2012

Tinkering with... Warlords Panzer II


Continuing on a theme, with another cold winter night prohibiting me using the airbrush in the shed I thought I'd finish off some Panzer II's I had started a while back. These are now from Warlord but the masters were previously BEF/Chieftain/ ex-Ian Crouch, to be fair I these are decent masters but not up to the current standard seen with Warlord, I was a bit non-plussed with them, hence their enforced deferment whilst I considered my options. The Panzer II is a fairly plane vehicle and generally not heavily stowed so I had my work cut out in order to make these bespoke.

Anyway List of Mods;

1) Standard clean, fill and sand
2) now standard thinning down of track guards
3) added representative Aerial points and aerials
4) small variety of stowage
5) Rear air identification flag from foil
6) Individual wire handles for the tool clamps
7) Engine plate handle
8) Opened up and added visors ( turret and hull)
9) New hatch made for commander version
10) Clamps for spare roadwheel
11) Front tow hooks added, glaring omission this one I'm afraid
12) addition of rear smoke dischargers ( sorry, couldn't find any chain fine enough for the caps)
13) added the holes on the exhaust muffler
14) Additional Spade
15) Addition of Jerry Cans and frame


I also added a Warlord Kubel (with the addition of Company B crew set and minor mods, note I've fabricated a separate windscreen with clear plastic insert for the glass) and two Black Tree Designs outriders, these have been pinned to "The Kings Armourer" cobble bases.


These are now in the priming and base coating process. Two fine coats of Halfords Plastic primer, not really needed for Warlord Resin, but essential for any of the American resins. If you use the grey version it gives you the advantage of being able to see any imperfections and chance to rectify.  This is then left for 24hrs in warm room ( i.e not my shed) to cure, then two fine coats of Halfords Matt Black and again 24 hrs to cure. As the last part in the process, I then touch up with Humbrol enamel Matt Black using a brush and yes another 24 hours..... Of course after the primer stage you could go straight in with one of the many coloured base coats now available.
 
[commission work]

Saturday 24 November 2012

Tinkering with.... Warlords sdkfz 7/1

Been waiting on this one for a while, and now finally got my hands on one as a commission.
This is basically a straight build with up detailing, nothing fancy really so areas of note are:

1) realignment of front drive spocket, slightly raised rather than in line with road wheels
2) addition of crew weapon racks on the mudguards.
3) up detailing of cab, map, handbrake, gear levers, binos etc
4) addition of ammunition boxes
5) foil zeltbhan
6) rear foot rests/ stirrups
7) width indicators on mudguards
8) spent shell cases

I have an Army Group North (AGN) ammunition trailer which I will most likely add ( now added!)


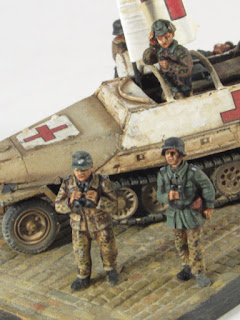
Tinkering with..... Sdkfz 250/5 part 2

Managed a bit more with this little one, main details are:
- crew bases removed
- crew figures assembled
- replacement of fixing brackets with wire
- aerial box, actual aerial mounts to come
- rear door handles
- canvas support over compartment.

This is just about ready for priming, quite pleased how this has came along.


Friday 23 November 2012

Tinkering with....Sdkfz 250 neu to 250/5 conversion

Another diversion project. After seeing warlords recent German forward observers set I wondered if I could make them fit in the diminutive 250. Always up for a challenge I assembled both sets and got to work.


The inside of the 250 would require the radio racks, which could be converted using the lump of resin that's already with the model, to be honest I'm not sure what its representing anyhow. The inside conversion would contain seats and a frame work for the scissor scopes, amongst lots of other crew stowage and odds and ends. Whilst I had assessed I could get all three figures crammed in the back it wouldn't leave much room for fine details, or at least the work would be negatory. I needed to remove the bench and detail the radio sets, the only real way to do this was by removed the rear plate. This was first drilled and then taken out with a scalpel, the interior was then opened out.


I had a run on basic conversion work which included:
- removal of mudguard, always wanted to do this on one as its seen so often!

- thinning remaining mudguard
- opening up drivers vision slot
- detailing radio set
- added radio box
- added stirrup points

I need to fully remove the figure bases, which I will do tomorrow with the sander. Thereafter I will prime to reveal any further imperfections or additional detailing required.

So here's the final shots from this session, all three ( of the five) crew happy in their new transport, although I'm sure they would want some heads......


Current FOR SALE items

1/56 Weasel
Will update soon, contact me for details


Blog Archive