Wednesday 21 March 2012

Sdkfz 251/10 - Schützenpanzerwagen (3.7 cm PaK).


Midweek Update, 1/56th goodness from Warlord, no mods, no frills, exactly as it comes, well with some paint.....  Warlord have recently upgraded the track sections for their 251's which are really quiet nice, it seems everyone is updating their masters, which is great for us.

and a teaser a nice Normandy 20mm ensemble coming up Saturday, probably some of the best i've done.....


Saturday 17 March 2012

Sturmgeschütz IV


Stable favourite this one, JTFM's 1/56th Stug IV with a few modifications.  The kit comes with separate schurzen plates and rails, however I've re-fabricated the plates with plasticard but utilised the rails. the track guards have been sliced and thinned and deployed open.

As commonly seen, the rear decks on these were quite heavily used for stowage, so I've added various tarpaulins, a field modified stowage box and some ammunition boxes, all kept in place with a Heer Zeltbahn from metal foil. The commander is battlehonours, if i recall correctly, with some greenstuff and wire headphones.
As always, click on the individual pictures for the warts and all view, and more extensive pictures in my gallery:


Wednesday 14 March 2012

Hetzer - Befehlswagen 38(t) - Disc Camouflage


This is the original all metal Crouchie variant, not entirely sure who has the molds these days. This has been updetailed to add various hatches, handles and the additional aerial points for the command version. The last picture in the series shows the work in progress shot, the commander is Battlehonours. The paint scheme on this one is the disc type ambush, so was my "tester" for some other larger paints which i'll show soon, not too hard to guess though.


Saturday 10 March 2012

Sturmtiger - Sturmmörserwagen 606/4 mit 38 cm RW 61

House clearance German style! This is Warlords 1/56th Monster, no mod's as it comes. I've gone for a subtle late war three-tone with lots of brick dust, although I have another coming through with a more complex scheme. As always more pictures in my flickr - link to the right.


Friday 9 March 2012

Still Alive! - General Status Update

To be honest I've had a bit of a rough time time recently, unforeseen pulls on the personal and work front have severely dented my "painting time". This has meant some slippages in finishing work, so apologies, you know who you are. 
This is probably a good time to highlight the effort involved in my work, crucially I don't paint sequentially as its not time effective, so at any one time I have several diverse pieces on the go. I need to do this:

              a) To keep me engaged;
              b) Allow me to fit particular elements of work around the time available to me;
              c) Its just the chaotic way some "Arty" people work.........

Any problems with either the build, paint or time obviously impacts the completion. Whilst I try and give realistic time frames these can go awry. The techniques used do not follow - step 1 - step 2 - step 3 and "voila". Frequently I redo things, even full repaints if I'm not happy. It goes without saying nothing goes out the door unless I'm 100% happy with, no matter what.

So what am I getting at? well.... essentially, I'm throttling back on new work for the time being, those chaps already in contact don't worry!  As always regulars have priority, so new commissions, by all means still contact me as I am always tempted by something new or different or challenging, or alternatively I can slip the odd piece in with concurrent batches. But it will be rare that I can give quick turnarounds I'm afraid.

Since Christmas the blog has been quiet, I have been pulling some late nights and ruining some prized W&N Series 7's finishing some key projects, most of which are now with, or on their way too, their new owners. I still have a few commissions "sticking" at the moment, but the back of the work is broken so bear with me. My thanks to those regulars who can tolerate my work schedules, I think it always pays off in the end.

I have a backlog of pictures of finished work, so will begin scheduling blog updates, probably two or three a week for the next couple of months, hopefully that will keep most people happy. It is fair to say that their is another step change in quality recently, but then that's for you to decide.

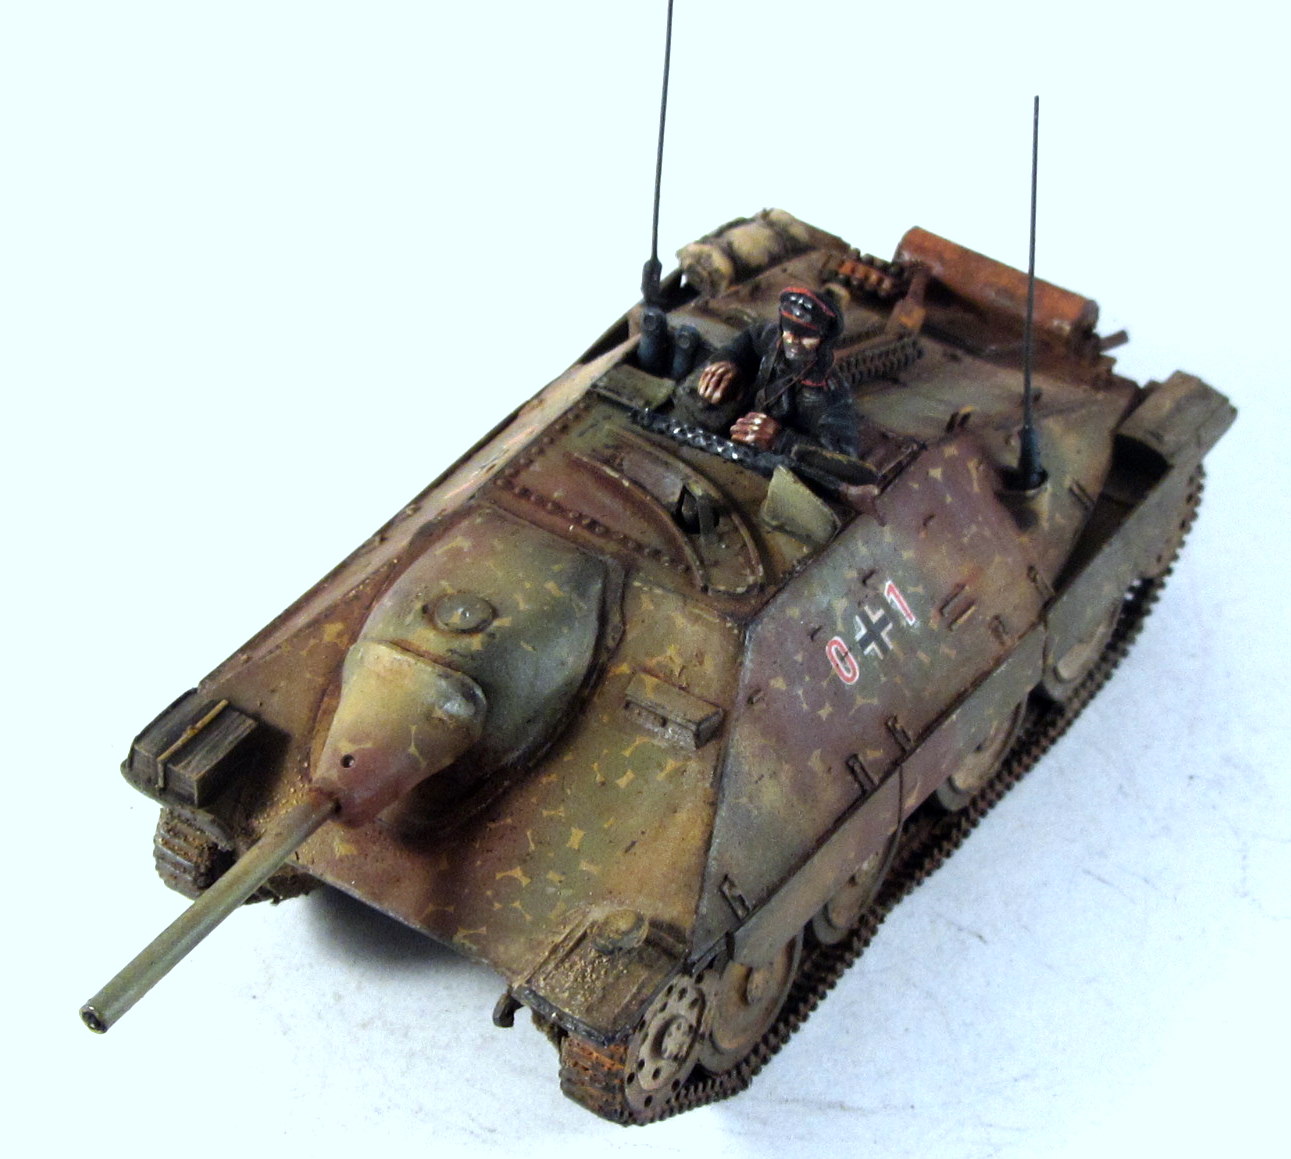
Oh, and the picture, well that's a taster for another update........

Oh, and finally, I always update my flickr galleries, before here, so you never know what you might find there.... 


Wednesday 7 March 2012

The Stricken Convoy - IndoChina - Part 2 - Complete.


All the work is now complete, here is the finished ensemble. Whilst a tricky and time consuming build, I'm more than happy with the results. All the upright GMC's have both drivers and co-drivers and i've tried to animate the jeep crew as if the mining of the truck had gione off behind, in convoy, Hence one chap leaning to the rear and the other on the walkie talkie.


All kits and figures are 20mm from Milicast, with minor and not so minor mods by me. As always more links in my flickr galleries, link accessed to the right.

Monday 5 March 2012

Stricken Convoy - IndoChina - Part 1

Interesting commission this one, seemingly innocuous, but has proved to be one of the most challenging yet......


The basic premise was an ambushed French convoy, in Indo China. Essentially one truck was to be depicted as just having hit a mine and has been brown onto its side.

All the kit work is Milicast, which is lovely scale and accurate stuff, but some bits are very fiddly.

GMC Build
The three upright GMC's needed to have drivers and co drivers, this always means a two stage paint and assemble. Whilst you wont be able to see it, I know each individual figure torso and head is fully painted and detailed in there! Essentially the drivers and cab interior need to be completed, then assembled, then masked and then the main painting could begin. All the figures used were resin from Milicast, again fiddly making them fit but easier to work with than white-metal.


The GMC's have the slightest of resin windscreen frame, which I think can be modelled opened up or closed, I foolishly offered to add "glass" in the form of clear plastic. I will spare you the profanities used in assembling these and making them fit and aavoiding the "super glue" smears. 

The cargo bed frames, were also a royal PITA, I made a template and bent and cut appropriate metal strip and applied each individually. These were a nightmare to line up and get looking equal, I think I just about achieved it.

The Stricken Truck

The disabled truck needed some minor mods. The bonnet/hood was cast so I cut it down and added a sheet foil bonnet, so it looks as if it has been slightly dislodged in the course of the mine explosion. The mudguard was removed and replaced with sheet foil at a "jaunty angle". The Milicast Trucks are not designed to be displayed on their sides so detailing underneath was understandably minimal. Not being intimate with the carriage workings of trucks I added some bits and bobs from the spares box and applied "mud" to cover up and rough detail. Dont email me if i got all the guibbins wrong, it looks fine to me! The tyres I had to work worth as best i could, again these are solid and attached.

The Spilled load
After some thought, I decided to make the stricken truck and load as a complete vignette and have the spilled load attached to the truck bed. This was quite simply achieved by making a "base" blob from green stuff and added the first layer of drums. The next layer was superglued in place for effect, and so on. In the end, the whole ensemble is quite sturdy.


Oh and as you can see, have been playing with the blogger template, and in traditional style can't seem to get back to the original! What do people think, this one allows much more whizzy things to be done with the content, based on selection at the top of the page.

N

Current FOR SALE items

1/56 Weasel
Will update soon, contact me for details


Blog Archive